Installation of Family Tree BD-FR-13
1. Product contents:
- Family tree divided into 10 parts
- 10 photo frames
- 1 bird
2. Attaching photos to the frames:
- Before attaching a photo frame to the wall, stick the photo to the back of the frame first.
- First, remove the photo tape and then attach the photo to to frame.
- Once the photo is attached, place the white adhesive gum on the back of the frame and carefully stick it to the wall.
3. Installing the Family Tree:
- The family tree comes in two sizes – 150x135 cm and 200x182 cm. You also have two variants:
- Left variant – The trunk is on the left side.
- Right variant – The trunk is on the right side.
- All parts of the product are packed a protective wooden template. All parts of the product are packed in a protective wooden template. Carefully remove them by peeling off the yellow tape from the back. Note that you can arrange the photo frames and bird in any layout you prefer. This guide follows the assembly shown in the illustration below.
- All tree parts (except the frames) have pre-applied double-sided foam tape on the back. After peeling off the film, you can stick each part to the wall. If you purchased the tree in wood decor, the wood grain on each part will align in the same direction when assembled according to this guide. - Preparation: Measure the wall where you will place the family tree. When assambled, the tree will measure 150x135 cm or 200x182 cm, depending on the size you ordered. The width of the tree is measured from the leftmost to to rightmost parts and the height is from the bottom of the trunk to the highest leaf.its width once assembled on the wall.
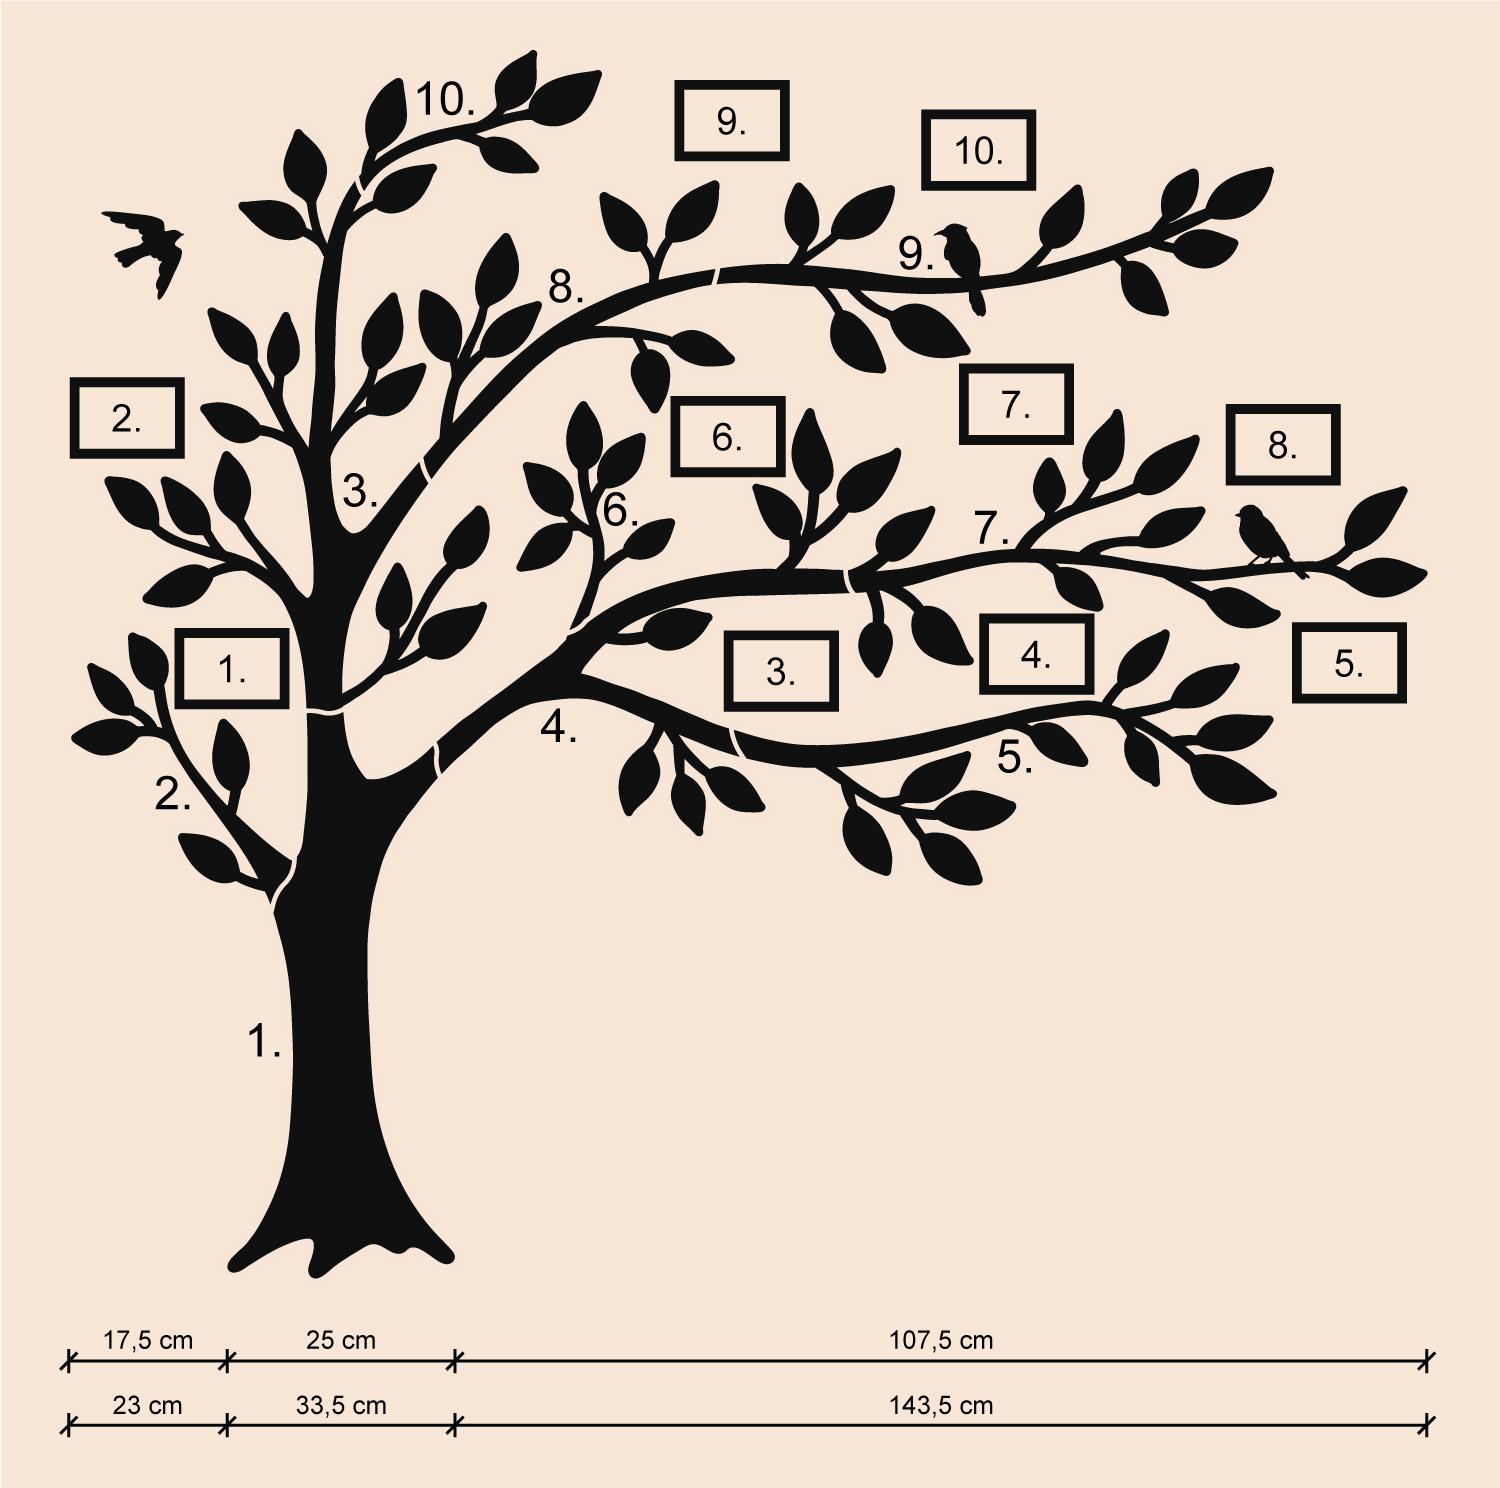
- Assambly: Once you're 100% sure of the placement, you can begin assembling. The best thing you can do is first arrange the tree on the floor to visualise how it will look on the wall. This let's you identify part placements and plan the layout. Measure the trunk’s placement on the wall, noting that branches will extend on both sides. Begin with the trunk (the largest part, labeled part no. 1), and stick it to the wall. For the left variant of the 150x135 cm tree, leave a 17.5 cm margin from the left edge, or 107.5 cm if measuring from the right, as shown in the illustration. Positioning part no. 1 correctly is essential, as all other parts will align with it. Once attached, removing it will be difficult.
- Attaching Additional Parts: After the trunk, continue with parts 2, 3, and 4. Attach parts 5, 6, and 7 to part 4, and parts 8 and 10 to part 3. Attach part 9 to part 8.
- Attaching Photo Frames and Bird: - Use the white adhesive gum to attach the photo frames, placing them as you like. Finally, attach the bird in any position you choose.
- Congratulations! The family tree is now successfully installed :)
4. Illustrative image of the family tree layout (left variant):
The illustration shows the numbered parts of the family tree and photo frames. Below the illustrative image are marked dimensions of family tree for both size variants (150x135 cm and 200x182 cm). The sum of the three dimensions equals the width of the tree once attached to the wall. These measurements help guide you when attaching parts to the wall.
